|
12.7 Sizing and
Signatures
For images that you intend to post
onto a web page or upload to an online photo-sharing site, the last two
things you’ll want to include in your workflow are cropping the image and signing your name. We’ll
consider both tasks in this section.
If the web site that you’re uploading your images to
isn’t your own, you’ll need to find out what restrictions the site
places on image sizes—both in terms of resolution (i.e., number of
pixels along the x and y axes) and the file size (in kilobytes or megabytes). For example, BirdForum.net currently limits its
users to images not larger than 1024×900 pixels and file sizes no
greater than 325Kb (kilobytes). As another example, Flickr.com limits file sizes to
10Mb (megabytes) and 1024 pixels on the longest side (unless you have a
“pro account”). In many cases, if you try
to upload an image that exceeds size or resolution limits, the server
will automatically resize your image; this is generally a bad thing,
because the automatic resizing algorithms used by these servers very
often reduce image quality, so what your viewers see on the site may
not look nearly as good as what you see in Photoshop. By resizing
the image yourself, you retain some control over how the image will be
rendered on the web. If, after resizing the image to particular
dimensions, you notice that the bird now lacks significant detail, you
have the option of cropping closer to the bird and then applying a less
aggressive down-sizing, which will typically result in more subject
detail.
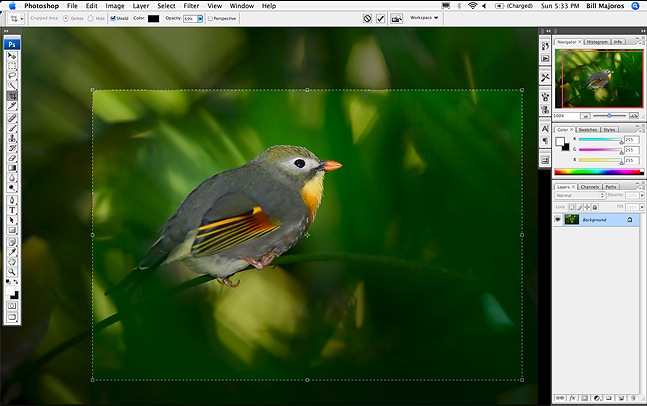
Fig. 12.7.1:
Cropping an image is all about crafting a composition that
presents the bird and its surroundings in a logical and aesthetic
manner.
It also affects the image dimensions and file size, so when preparing an
image for web deployment, you may want to consider several different
options that balance aesthetics against size constraints.
Recall from
sections 8.1 and 10.1
that cropping can be used to as an artistic tool
for re-framing the subject and thereby pursuing a more pleasing
composition. Inasmuch as the act of cropping affects the
aesthetics of the image’s composition, you’ll need to balance the
compositional considerations against the advantage that cropping
provides when you’re facing image size constraints. As with many
things, I personally take an empirical approach to resolving this issue
in my own images: when faced with sizing constraints (whether
denominated in resolution or file size), I try out many different
options for cropping the image, viewing each at the target size and
assessing my feelings for each. If I don’t find any of the
options acceptable, I simply don’t post the image (at that
venue).
The actual mechanics of cropping and sizing of the
image are straightforward in Photoshop. We’ve already discussed
the Crop tool (section 10.1);
the use of this tool is illustrated above in Figure 12.7.1.
Resizing an image in Photoshop is performed via the Image > Image Size option, which
presents a dialog box with various options (see the figure
below). Here you can either specify a resolution in pixels, or a
percentage of the original (e.g., 20% of the original image dimensions,
applied equally to the x and y axes). If you enter only
one pixel dimension, the other will be computed for you automatically
(unless you click on the chain icon, which voids the constraint on aspect ratio). There are a
number of other options in this window, but I personally ignore just
about all of them.
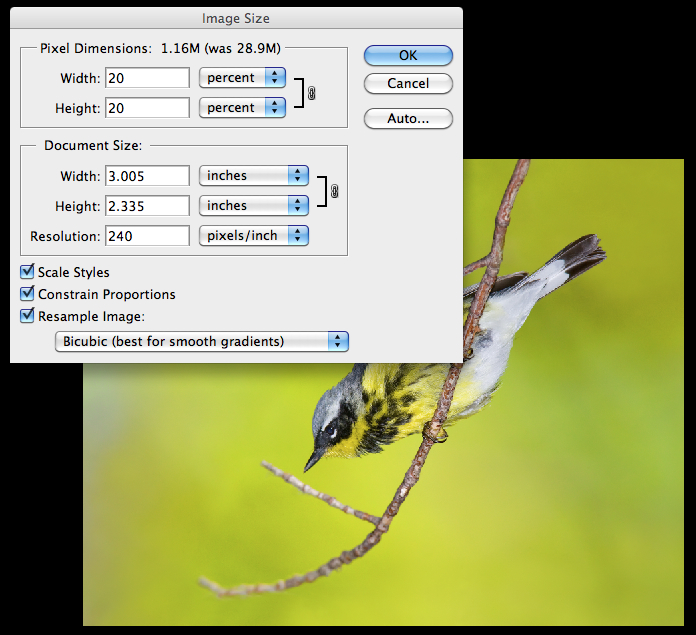
Fig. 12.7.2:
Sizing an image can be done based on absolute pixel dimensions
or as a percentage of the original image size. The Image Size
dialog box in
Photoshop indicates the target file size for a given target
resolution. You can
also specify a pixel dimension for one axis, and Photoshop will
automatically
compute the other axis dimension, subject to a fixed aspect
ratio. Several sampling
algorithms are available, but Bicubic (basic) works well without
introducing
too many artifacts; pre- and post-sharpening are recommended, to retain
maximal control over the final image (see the text).
One particular
setting in the Image Size window
to be careful about is the resampling algorithm (shown at the bottom of
the window in the figure above). In the preceding example, this
is shown as Bicubic; other
alternatives include Nearest Neighbor,
Bilinear, Bucubic Smoother, and Bicubic Sharper. The last of
these—Bicubic Sharper—is very
likely to tempt you at some point, once you notice the loss of detail
subsequent to resizing under the default algorithm (Bicubic). In my experience,
the Bicubic Sharper tends to
introduce artifacts and in general to just be too unwieldy. My
own approach to dealing with the loss of sharpness that typically
occurs under the default resizing algorithm is to apply a pre-sharpening before resizing and post-sharpening after
resizing. For the pre-sharpening, I use the Unsharp Mask with a radius of 0.3;
for the post-sharpening I use a radius of 0.15 or 0.2. In order
to find the ideal settings for the Amount
slider in the Unsharp Mask, I
typically go through several complete iterations of trying out
different settings for the Amount
of both the pre-sharpening and post-sharpening. This process may
sound laborious, and the first few times you do it it may be laborious,
but once you’ve got the hang of it it’s typically not very
time-consuming at all.
In terms of choosing the pixel dimensions, if you’re
posting the image to your own web site you’ll generally have complete
freedom to size the image as you like. To be practical, you’ll
generally want to size your web images so that they’ll easily fit
within the web browser window of the typical internet user. Doing
so helps to reduce the chance that your images will end up being
auto-resized by the user’s browser; these auto-resize
operations typically reduce image quality, and it’s thus best to avoid
them if possible. Assuming your user has his or her internet
browser maximized and is using a typical monitor of size 1440×900 or larger, the free space in
the viewing pane of the browser will typically be about 1024×768 (remember that the browser has
a menu bar, scroll bars, and typically a control panel with navigation
controls, and these all take up real estate on the screen). Thus,
you should try to keep your images smaller than 1024×768 to reduce the incidence of
auto-resize operations by the user’s browser.
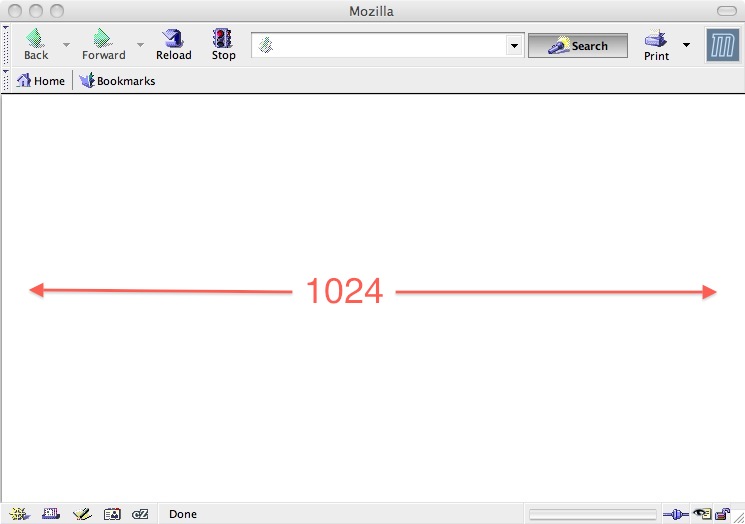
Fig. 12.7.3: Users viewing your images over the internet will see your
web page within the context of their browser window. Most
computer
screens these days are 1440x900 pixels or larger, but with the browser
taking up screen real estate for its various tool panels and the like,
you’re
best off budgeting for 1024x768 as the maximal size for your web images.
As of mid-2010, many laptops are selling with screen
sizes of 1440×900, while most stand-alone
computer monitors are in excess of 1280×1024 pixels. Keeping your
images small enough to display at full size on these devices (after
accounting for loss of real estate due to visual elements of the web
browser) will help to improve the chances that users will see the image
without any resizing artifacts introduced by their browsers.
Another thing you can do, when hosting images on your own web site, is
to encapsulate each image in its own HTML file. Some browsers
will resize images when the page consists of nothing but the image
itself, while images embedded within a proper HTML file will sometimes
be spared any resizing.
In terms of file size, there are a few things you
can do if you find yourself exceeding the limit of some online
venue. First, you can obviously reduce the file size by further
cropping the image, since cropping eliminates pixels and therefore the
need to encode those pixels in the file. Thus, when the
destination site imposes both resolution and file size constraints,
it’s best to first attend to the resolution constraints, and then to
see if, after having reduced the resolution as needed, there is still a
need to reduce the file size. If so, you can do so via the JPEG Options dialog box in
Photoshop, which will appear when you try to export a PSD or RAW file
as a JPG image. This is depicted in the figure below.
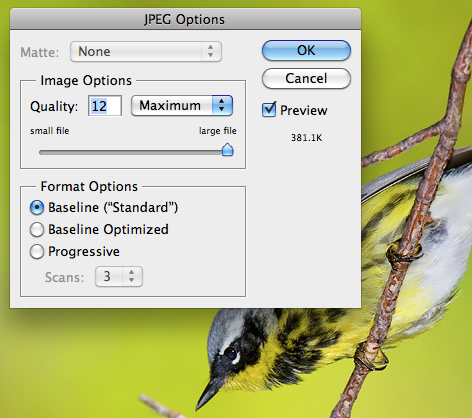
Fig. 12.7.4: The JPG file format allows for variable quality
settings, which affect both image detail and file size. The only
way to be sure that your image will look acceptable at a given
JPG quality setting is to try that setting and view the resulting
file in a WYSIWYG viewer such as Photoshop.
For web images, many people use a default Quality setting of between 8 and
10, which in most cases should produce images with very reasonable file
sizes. Increasing the Quality
setting to 12 often results in a very substantial increase in file
size, and in many cases the difference in image quality between
settings of 10, 11, or 12 won’t be apparent to casual viewers.
Unfortunately, the only way to be sure is to try saving the image at
different Quality settings
and comparing them on-screen after re-opening the exported JPG
files.
The costs associated with posting larger image files
on the internet are gradually decreasing, but are still worth
considering at present. Keep in mind that not all of your users
may have high-speed internet access, so if you’re in the habit of
posting Quality 12 images approaching 1 Mb in size, you may find that
some users avoid your web site due to the slow download times of your
images. Depending on your hosting plan and the level of monthly
traffic to your site, you may also want to consider the impact of
posting large files on your monthly bandwidth quotas; for quality
hosting plans this won’t normally be an issue unless you’ve got
hundreds of thousands of viewers coming to your site every week.
For non-web deployment of images, sizing
considerations tend to be simpler, since you’ll generally want to use
the highest-resolution version of a file that you’ve got; this is
particularly true for print publication, where the ever-increasing
capacity of print devices tends mostly to place lower bounds rather than upper
bounds on practical image resolutions.
Now let’s consider what should, in most cases, be
the very final task prior to web publication of your newest bird photo:
proudly signing your name to your new masterpiece. In Photoshop
you need only invoke the Text tool,
click on the image where you’d like the signature to appear, and then
type your name. It’s a good idea to also include a copyright
notice, such as ©2010 before your name, if you’re concerned about
unauthorized use of your images.
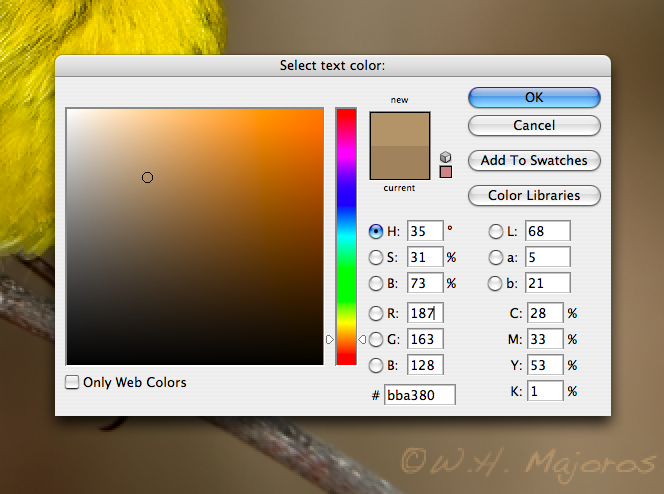
Fig. 12.7.5:
Don’t be afraid to assert your rights by signing your art, but
try to do so in a manner that minimizes any impact on the image
aesthetics.
Position your signature in the left or right bottom corner of the
image, and
choose a font color that almost blends in with the background. A
good font
for signing your name in Photoshop is Dakota/Handwriting, though there
are
others that you might instead prefer.
With the text tool still activated, you can click on
the color indicator near the top of the screen in Photoshop to bring up
the text color window (see the figure above). I highly recommend
choosing a text color that blends well with the part of the image
behind your name, so that your signature is clearly decipherable upon
careful inspection, but does not stand out in the image as a
whole. Viewers who want to know who the artist is will surely
inspect the lower left and lower right corners of the image (where your
signature should appear), while others who are uninterested in knowing
who deserves credit can still enjoy the image without being distracted
by a gaudy copyright sign—or, worse yet, a highly visible watermark
image superimposed in large strokes over the central part of the
image. When it comes to signing my own works, I take inspiration
from classical painters who signed their names discretely in some
out-of-the-way part of the painting near the bottom of the
canvas. This serves the twin goals of asserting the artist’s
rights while preserving the aesthetic impact and visual beauty of the
overall work.
|
|
|
