|
7.6
Fill
Flash Versus Flash as Main Light
If you’ve spent any time reading
popular bird photography articles, you’ve very likely encountered the
term “fill flash”. Indeed, I’m often asked by
novices exactly
what setting on the flash unit corresponds to “fill” flash versus “normal” flash. In truth, there is
no special setting on the
flash unit that corresponds to “fill flash”. The idea is, of
course, to “fill in” the shadows left by “natural light” (typically
direct sunlight, though sometimes directional ambient light). The
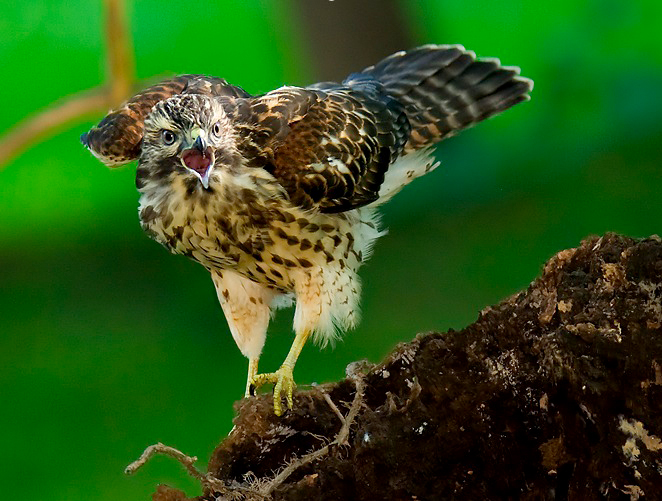
figure below illustrates this very nicely: although the sunlight is
shining on the bird from the right, the left and underside of the bird
are lit almost as well as the right, due to the use of flash (as well
as some postprocessing—see Chapter 11).
Fig.
7.6.1 :
An example of flash used as fill. The sunlight was shining very
strongly from the right
(notice how bright the right side of the bird's face is), creating dark
shadows over the rest of the
bird. Strong fill flash illuminated the rest of the bird, and
additional lightening in Photoshop
restored a more uniform illumination over the entire bird. Notice
the catchlights in both eyes.
The real phenomenon of interest here is the
manipulation of the flash ratio—the
ratio of flash to
ambient (including both direct and indirect sunlight). When the
ratio approaches 1:0 (i.e., mostly flash and little or no ambient), we
say that flash is being used as the main
light source; otherwise, it’s fill
flash.
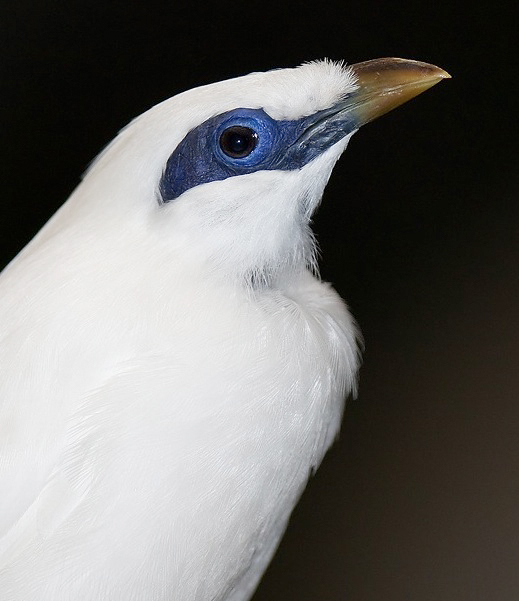
The figure below shows an example in which flash is
being used as the main light source. In this case, the flash
illuminated the bird very well, without adding any illumination to the
background whatsoever (due to the angle of the water relative to the
camera), while the ambient light provided only negligible amounts of
illumination to the background, overall.
Fig.
7.6.2 :
Flash as main light. Because this
photo was taken after sunset in a dense forest
setting, flash had to be used to provide all
lighting. Because flash affected the bird
more than the background, the bird stands
out very prominently in the image.
In the case of the above image, I used flash as the
main light because
I was forced to do so: the sun had just set, and no practical
combination of aperture / shutter speed / ISO would have resulted in a
bright-enough exposure to give a low-noise and blur-free image of the
bird. Photographing birds after dark is, of course, something
that most people rarely do, and so the use of flash as main light tends
to be fairly rare in bird photography. Hence, most uses of flash
in bird photography constitute “fill flash”, and there’s little need to
worry over whether your use of flash is technically “fill” flash or
not. In other words: just worry about illuminating the
bird. If you can do that and still have access to enough ambient
light to also illuminate the background, then utilize whatever flash
ratio you can that will give you the desired effect.
As a caveat to the foregoing discussion, it must be
noted that there are several very notable applications of the use of
flash as main light. The first is the use of flash to freeze
extremely fast motion, such as the motion of hummingbird wings; we will
deal with this in detail in the next section. The other
application is in producing what I call “low key” images, in which only
the bird is illuminated and the rest of the frame (or most of it)
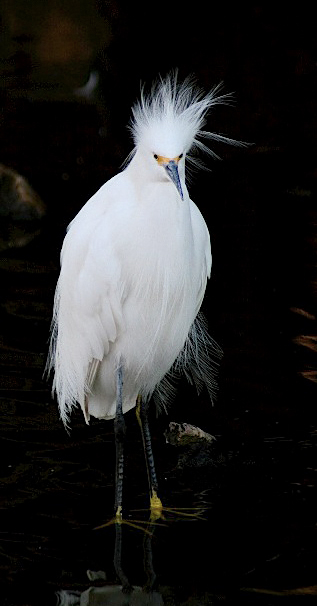
appears black. The image below is one such example. In this
case I intentially used an extreme flash ratio to render the bird fully
illuminated upon a field of (mostly) black.
Fig. 7.6.3 :
Another use of flash as main lighting. Notice the fine feather
details in the pure white feathers of this bird, which flash helped to
bring
out via micro-contrast. Note also that the ambient light provided
a nice
gradient to the background, giving the bird more of a sense of place.
(1/300 sec, f/4, ISO 800, TTL flash at -1 2/3, 600mm)
This type of image is very specialized, and
considered by some (perhaps many?)
to be cliché; certainly, you don’t want to make all of your bird photos look this
way. A more judicious use of flash ratio (thereby staying within
the domain of “fill flash”) will give you images that, on
average, have
more colorful backgrounds and less startling foreground / background
contrast.
Note that using flash as main light doesn’t always
give you a dark background. If the backdrop is close enough to
the bird to be illuminated by strong flash, but far enough back to be
rendered reasonably out-of-focus (given the effective depth-of-field
for your selected aperture and distance), flash as main light can work
quite well. In order to illuminate the backdrop, however, you
typically need to be using fairly strong flash, and that more than
likely means shooting at your camera’s sync speed (typically 1/200 or
1/250 sec for consumer-grade models, or 1/300 sec for pro
models). The down-side of shooting at these slow speeds is that
motion blur can occur if the flash ratio is too low. But when
flash is used as the main light, by definition the flash ratio is
generally high enough to keep motion blur and ghosting at a minimum.
The best strategy, when you’re just starting out
with flash, is to choose some reasonable exposure and flash settings
(based on prior experience with your particular camera and flash unit)
and to take a few shots at the start of each session in the field and
see how your exposures are turning out. Concentrate first on
correctly exposing the bird, and after that on getting a nice
background exposure. Modifying the in-camera and flash exposure
parameters in tandem will then allow you to explore the range of
possibilities for the relative exposure of the bird versus its
background. At that point you can begin to form your artistic
goals for the scene, and then fine-tune the camera/flash settings in
pursuit of those goals. And keep in mind that much of your
artistic inspiration may come later, during post-processing on the
computer. As such, it’s often a good idea to experiment with
different flash ratios in the field, so as to maximize your range of
feasible options later during post-processing.
|
|
|