8.4 Getting Close
With relatively few exceptions,
the most common problem for bird photographers in the field is getting
close enough to capture a detailed image of the bird. Even
exposure problems due to limited lighting often reduce to the problem
of getting close enough for the effective use of flash. And
although there are certainly many instances in which the scenery itself
can carry the image and the bird therefore needn’t be especially large in the
frame, for hopelessly obsessed bird-lovers the feathered subject rarely
seems to be close enough to the camera. In this section we’ll
survey quite a wide variety of approaches to solving this most
fundamental of problems.
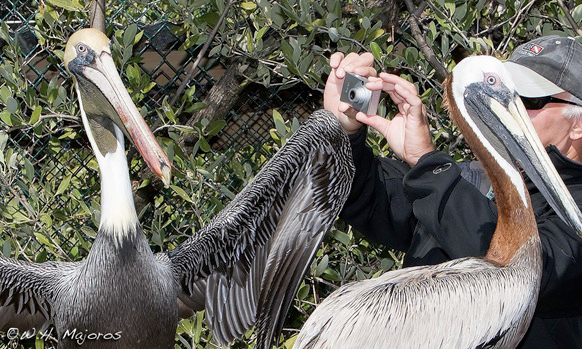
Fig. 8.4.1 :
Getting close usually isn’t this easy. In this case, the
enterprising tourist was able to get close to these free-ranging
wild birds because they had become accustomed to human
contact. City parks often have the tamest birds, for precisely
this reason.
The first task
in getting close to the bird is just finding
the bird. For birds that aren’t terribly common in your area of
residence, it’s often better to make a special trip to some place where
that bird is common, than to
try to capture the occasional image of the bird in suboptimal
habitat. As a case in point, I used to spend many hours trying to
get just one good warbler photo in my home town; now I instead make a
yearly 10-day trip to a warbler hot-spot far from home, where I can get
a hundredfold more photos of warblers in a single day than I could back
home in an entire season. It’s a simple matter of
efficiency. It’s more efficient for me to drive nine hours to
Ohio and intensively shoot for ten days, than to spend hundreds of
hours scouring the local parks in the North Carolina piedmont (where I
live) for a few mediocre warbler photos.
For birds that are
common in your home area, there are some definite strategies that you
can employ to (hopefully) improve your rate of contact with those
birds. The first strategy is to cast a wide net for information
about bird concentrations. Your local bird clubs or online forums
and e-mail listserves are good starting points. Other birders can
be a truly invaluable source of information about recent bird sightings
and also about observation sites that you may not know about
(especially sites that aren’t part of any official park).
Within a park or other natural area, a general
strategy for finding the species you’re looking for is to seek out the
wandering, mixed-species flocks that commonly rove about, especially
during non-breeding seasons. In North America, for example,
chickadees and titmice (genus: Parus)
often wander about together, and other birds such as warblers and the
like sometimes tag along behind them. So, even if you’re not
especially interested in chickadees or titmice, it may be productive to
hike around till you find a roving flock of these common birds, and to
then seek out the hangers-on that follow in their wake. Keep in
mind also that even photos of common birds can unexpectedly turn out to
be exceptional, if they capture the bird in a novel pose or with a
particularly striking background.
An especially effective strategy is one that can be
summed up in a single word: opportunism.
My personal philosophy is that by just wandering around photographing
the common birds that happen by, I should over the course of enough
time also encounter a goodly number of less-common birds without having
to specifically seek them out. In my experience, seeking out a
particular species of bird most often results in a depressingly low
rate of “return on investment”. When I go out in the field
I simply seek out any birds that I can find; in the process, I might
also encounter a number of unexpected varieties that in time can swell
the “species diversity” of my portfolio. The
advantage of being an opportunist is that you can avoid the frustration
of failing to find the bird you seek, while occasionally reaping the
rewards of the chance encounter with an unsought, but highly
appreciated, rare sighting.
There’s an old saying that “the harder you work, the luckier
you get.” This is, in fact, a
mathematical truth: as long as a desired event isn’t completely
precluded, the more chances you incur the greater the overall
probability that it will occur at least once over the aggregate trials
(or, more compactly: limn–>inf
1–(1–p)n=1, for 0<p<1). What this means for
the opportunistic bird photographer is that the more time you spend in
the field, the more high-quality photos you should get (on
average). As I look back on some of my own favorite photos, it
becomes increasingly clear to me that I owe those images to my large
investment of time in the field collecting lucky shots. There’s
no substitute for excessive amounts of time spent in the field.
While we’re on the topic of time, it’s worth
mentioning what should probably be obvious for any experienced bird
watcher—that early mornings and (to a lesser extent) early evenings can
be especially productive times of the day for bird photography.
We’ve already commented on the potential for sunset images (section
8.2). The hours spanning
sunrise and early morning are
potentially more important for many birds that have fasted all night
and need to procure calories to fuel their elevated metabolism.
When traveling to an exotic location for the purpose of bird
photography, it can be especially critical to put in morning and late
afternoon hours. In the hour before sunset many birds can be on
the move in search of roosting spots, or in search of those last few
calories needed to keep their metabolism going till morning. The
low angle of sunlight can also be beneficial at these times.
Although some people consider it “cheating”, a great way to increase your
contacts with birds is to bring them to you, by drawing them in with
bait. Setting up a birdfeeder close outside your window can be
extremely effective at bringing granivores (seed-eating birds) and
nectarivores (i.e., hummingbirds) within shooting range.
Fig. 8.4.2 :
Bribery is sometimes the best way to get what you want.
Carrying a small bag of birdseed with you in the field can sometimes
prove useful for attracting granivorous birds. I’ve used this
trick in
winter in areas where the birds could be heard but not seen.
Spreading a bit of seed on open surfaces can sometimes bring
them out where you can get photos of them.
Fruit-eating birds can also be
drawn in by setting out oranges or other types of fruits; some people
have also had luck drawing in orioles and other frugivores by putting
out some jelly, though this can be dangerous for hummingbirds because
they can get the jelly on their feathers and then get stuck or become
unable to fly. Suet also brings in many birds, including
woodpeckers and even some warblers.
Fig. 8.4.3 :
For some birds, fruit is a much better form of
bribery than birdseed. In addition to oranges, I’ve had
luck bringing in various frugivores with bananas,
cantaloupes, and even pineapples.
Away from home, bait can still be
used, though some care must be taken to ensure that legal and ethical
considerations are observed. In many parks and wildlife preserves
the feeding of any animal is prohibited, and these prohibitions are
often put in place to protect the animals. Feeding fish to
waterbirds at a fishing pier, for example, can be detrimental to the
birds since it’s likely to condition them to loiter at the pier, where
the constant presence of fish hooks can be a serious threat.
Fig. 8.4.4 :
Grains and fruits won’t work for carnivores. In environments
harboring many carnivorous waterbirds such as herons, egrets, and
pelicans,
a good strategy is to pick up a box of frozen sardines from the local
bait shop
and let them thaw in a cooler of tap water so you can set them out for
any
hesitant birds you may encounter in the field. I’ve only done
this once (in
Florida), but it worked like a charm, and I’ll probably do it again
when I
next have the opportunity.
Zoos and other places with captive birds—while again
technically “cheating” according to some people—are also
great places to get intimate shots of otherwise hard-to-find
birds. For those of us who have to work for a living (doing
something other than photography), the time and money constraints
typically make a trip to the zoo much more feasible than a trip to
Antarctica or Africa. There are some caveats involved with
shooting at zoos, however.
First, note that some zoos (such as the San Diego
Zoo) prohibit commercial use of photos taken of their animals.
Technically, this means you wouldn’t be able to sell your prints or
publish your images in a magazine (see Chapter 14 for tips on selling
bird photos). Some might also ban professional (or even
professional-looking) photographers, so be sure to call first and ask
about their policies).
A major difficulty in shooting zoo animals is that
there will typically be a cage or glass enclosure that you have to
shoot through. Glass can be a problem for flash photography, due
to the reflection from the glass; in some cases this can be mitigated
by shooting at an oblique angle to the glass, so the light reflects
away from the camera rather than toward it. I generally don’t
bother trying to shoot through glass at all, because it’s usually so
scratched and dirty that the resulting image would be terrible anyway.
Shooting through wire mesh, on the other hand, can
often work surprisingly well. The trick is to get as close to the
mesh as possible, and wait until the bird is far from the mesh.
Since you’ll be focusing on the bird, which is far from the mesh, the
mesh should be rendered out of focus if you use a large enough
aperture. In many cases you won’t be able to tell from the image
that the bird was in a cage. Obviously, you’ll want to ensure
that the background contains no visible man-made objects, if at all
possible.
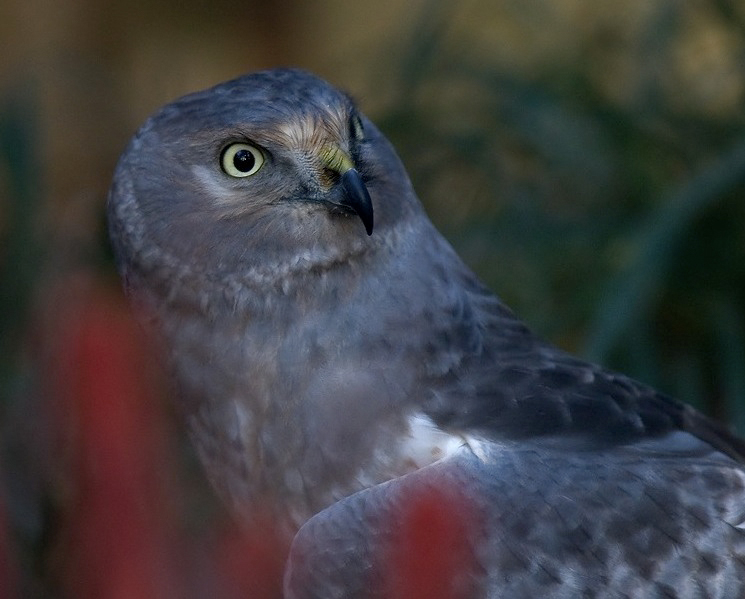
Fig. 8.4.5 :
Photographing birds behind glass or wire mesh requires some care.
For glass, either don’t use flash, or use an oblique angle to avoid
flash glare.
For wire mesh, put your lens as close to the mesh as possible and use a
shallow
depth-of-field to render the mesh completely out of focus. The
above photo was
taken through wire mesh, which is so out-of-focus it’s invisible.
Even in the
wild, there are some locations in which the birds are much tamer than
elsewhere. At many locations in Florida, for example, the birds
are so tame that you can literally walk right up to the bird and take
its photo from a distance of mere yards or even feet. Elsewhere,
birds tend to be approachable in small city parks more than in outlying
suburban parks, because the birds living there are constantly exposed
to people and are less wary of them. Formal gardens can be great
places to find granivores, due to the availability and variety of seeds
year-round. Duck ponds where children feed the ducks are likewise
very productive.
For truly wild birds out in the wilderness, a good
strategy for increasing your sightings of the bird is to find its
nest. During the breeding season, finding an active bird’s nest
is like a give from heaven. When the chicks are in the nest the
adults can be expected to return regularly to deliver food, and these
comings and goings provide opportunities for getting the bird in
flight. Finding nests can be very difficult; one strategy for
finding them is to follow the birds in the field, and especially take
note of any bird that you repeatedly see flying by in the same
direction over the course of an hour or so.
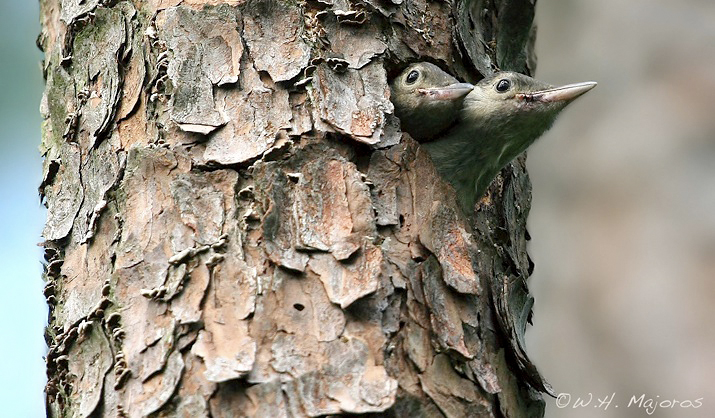
Fig.
8.4.6 :
Finding a nest can be a godsend. In spring, take particular note
of any bird that seems to be flying repeatedly to the same location, or
that
flies past you going in the same direction. It could be a parent
making
frequent deliveries to a nest full of chicks.
If you do find a bird’s nest, be
extremely careful not to endanger the birds by getting too close.
Some birds, such as bald eagles, can be extremely sensitive to the
presence of humans close to the nest, and may abandon the nest (and the
chicks) if they feel harassed. Also, walking right up to
the tree in which a bird is nesting can lead raccoons to the nest by
laying a trail of your scent up to the tree; many naturalists who’ve
tried to help out a bird family by removing parasitic cowbirds or
cuckoos from another species’ nest have returned the following
day to find that raccoons came during the night and ate the remaining
chicks. Always keep the safety and comfort of the bird at the
very top of your priority list whenever you’re in the field, and most
especially so at nests.
In addition to
nests, another good find is a favorite perch. Some exposed snags
make such good perches that many different birds can be seen using them
over time. Some birds have a daily routine that places them on a
particular perch at nearly the same time every day. If you find a
situation like this, you can set up shop near the perch and wait for
the bird to come; landing shots of a bird approaching a perch can be
very nice.
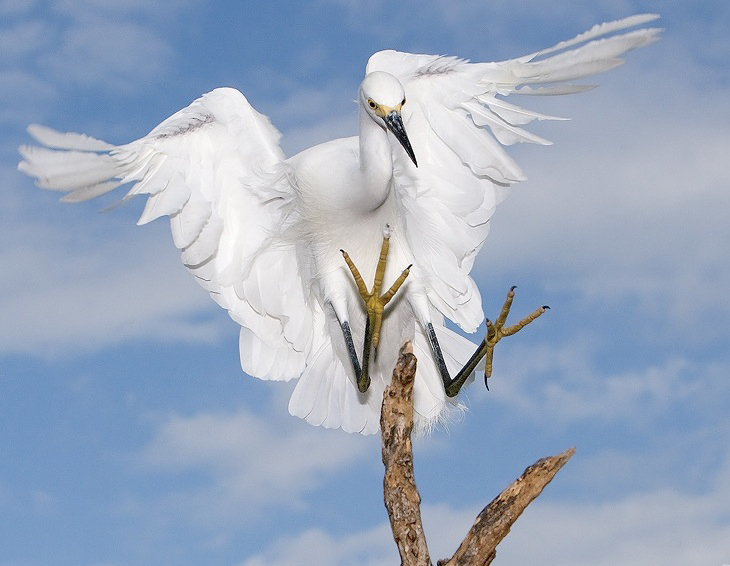
Fig. 8.4.7 :
If you know the bird’s daily schedule, you can try to get to
where it’s going before it gets there. For the photo above, I
knew that
the birds would be coming in for the 3:30pm daily feeding at the wild
bird center in the Florida keys. They show up like clockwork
every day.
For waterbirds the way to get close is to approach
low by crawling or
slithering on your belly up to the edge of the water. By staying
low you can either avoid being seen by the bird, or avoid scaring it
away if it does see you; a low angle is also a good one for artistic
reasons (see section 8.2). There are some
things you can do to
make such a low approach easier. First, using a frying pan as
mentioned earlier can make it much easier to slide your large camera
rig along. Wearing gloves and knee pads can reduce some of the
discomfort when crawling on your hands and knees, though obviously your
gloves could get very dirty and then be useful later when operating the
camera. While sliding over hard mud or sand, a tarp can be used
to keep your clothes from getting too soiled, though doing so quietly
can be very difficult.
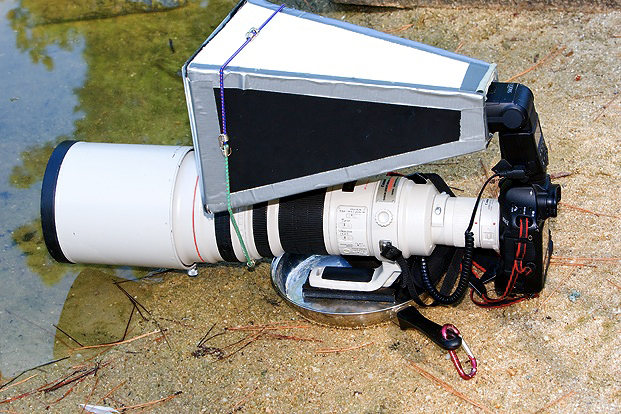
Fig. 8.4.8 : A
frying pan can be useful not only when shooting from a low
angle, but also when approaching on your hands and knees, since you can
slide the pan and its contents along on the ground ahead of you.
A popular way
to get close to
birds in the wild is to stake out a photo blind. I’ve rarely had
any luck with this, because there aren’t many blinds in the places
where I go, and the’re rarely located exactly where the birds
are. An alternative is to use some sort of portable blind.
Small, lightweight camouflage tents are available from hunting supply
stores; these can be can be carried fairly easily in the field and then
set up wherever needed, though they tend to be cramped and in the
summer they can get quite hot inside. An even more flexible
alternative is to use what might be called a wearable blind—that is, to apply
heavy camouflage to yourself and your equipment, so that all you need
to do when you find a good location for shooting is to just remain
still and effortlessly blend in. The photo below (courtesy of Fred Hurteau)
illustrates this strategy very nicely.
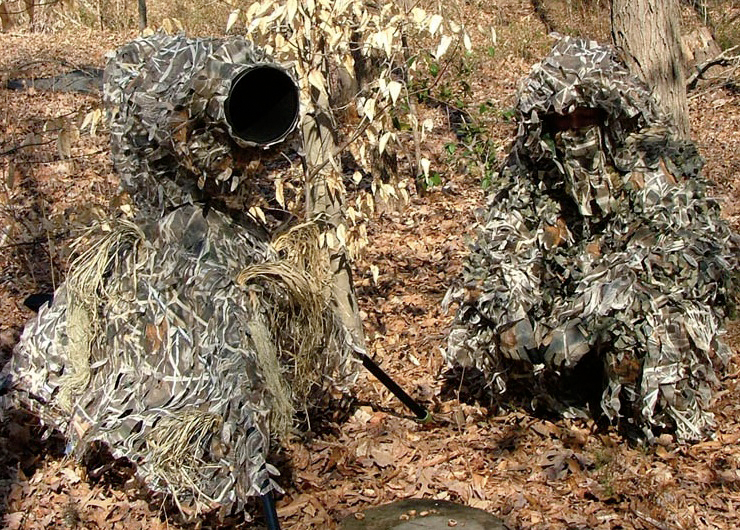
Fig. 8.4.9 :
Camouflaging yourself and your photo rig can sometimes be as effective
as
using a stationary photo blind, while permitting far greater
mobility.
Photo ©Fred
Hurteau, used with permission.
In some places
you can use your car as a blind. Sitting in the car with your
lens resting on the window frame, you can sometimes gain the trust of
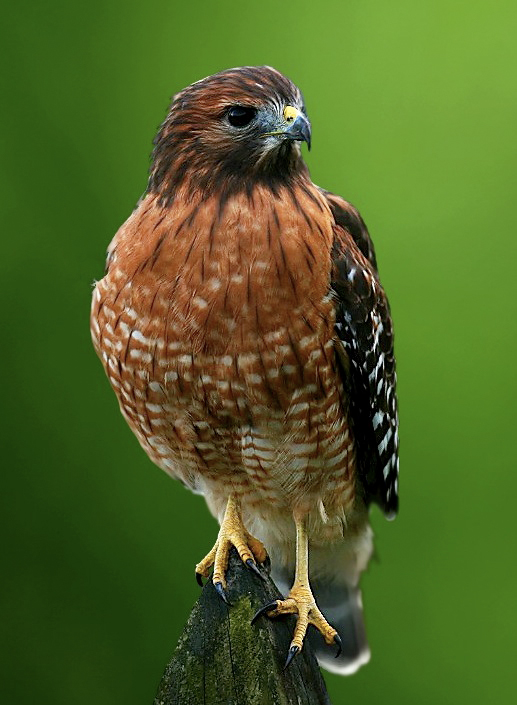
birds easier than if you were standing outside your car. The hawk
photo shown below was captured this way. The bird was actually
hunting along a busy road when I happened to be driving by. Over
the course of twenty minutes I was able to progressively reposition my
car until I was within about 20 feet of the bird. Note that the
background of the image has been replaced in Photoshop; the original
background featured a hotdog stand (!).
Fig. 8.4.10 : A
hawk I photographed from my car. I found this bird
hunting next to the road. I pulled over and slowly positioned my
car within shooting range. Because the background included a
hotdog stand, I replaced it in Photoshop.
You can buy special window-mount supports for your lens to use in the
car, but I’ve never tried these. In the few cases where I’ve used
my car as a blind, the use of special window-mounting hardware either
would have taken too long to set up, or simply wasn’t needed.
Just be careful not to drop your lens out the window (or to
accidentally press the electronic window control).
When approaching any bird, it’s obviously important
to try to avoid getting so close that you scare off the bird. One
way to do this is to watch the bird very carefully and study its
behavior for any signs that the bird is becoming alarmed. If the
bird continues foraging without taking any notice of you, it’s usually
safe to continue approaching (slowly). If the bird stops what it’s
doing and looks at you (even if with only one eye), it’s best to stop
your approach, remain very still, and wait to see what the bird does
next; it may even help to turn around and face away from the bird, to
allay any fears the bird may have that you’re a predator hunting for
food. Depending on how desperate you are to get any photo of the
bird at all, you may want to hold off flashing the bird until it again
appears relaxed, since flash might scare off an already alarmed
bird. And as already mentioned, always respect the bird.
There are a number of factors that can influence how
approachable a bird is. As previously mentioned, birds living in
city parks tend to be more approachable than the same species living in
secluded areas. Juveniles tend to be more approachable than
adults (a good thing to keep in mind in summer). Predatory birds
feeding on large prey items are sometimes more approachable than they
otherwise would be (since flying off would probably mean losing their
meal). The species of the bird matters
too: belted kingfishers (Megaceryle
alcyon) are usually very difficult to get close to, while
saw-whet owls (Aegolius acadicus)
are reputed to be so approachable that it’s possible to walk right up
to the bird and photograph it with a macro lens. Finally, daily
contact with the same individual will sometimes allow you to earn the
bird’s trust (to some degree). In the case of
the osprey (Pandion haliaeetus)
photo below, I was standing almost directly beneath the
bird; most raptors would fly off before you even got close to the
tree. In this case, the bird was a juvenile with a carcass, and
had become accustomed to my presence over the course of several weeks.

Fig. 8.4.11 :
An osprey I photographed while standing almost directly beneath it.
Several factors allowed me to get so close. First, the bird is a
juvenile. Second, the
bird was familiar with me and my camera rig, since it saw me almost
every day at
its nest while it was growing up. Finally, the bird was feeding
on a carcass, which
would have been slightly inconvenient to fly away with.
One strategy
that will occasionally pay off is to observe which way a foraging bird
or flock is moving, and to position yourself so as to be in the bird’s
path. In other words, let the
bird come to you. I’ve found that birds will often come
much closer to me than they’ll let me approach them. This
strategy also has the advantage that it allows you to get some test
shots (to fine-tune your exposure and flash ratio) while the bird is
approaching you; taking test shots while you’re approaching the bird
can often be much more difficult (e.g., when you’re crawling on your
belly or have your tripod slung over your shoulder).
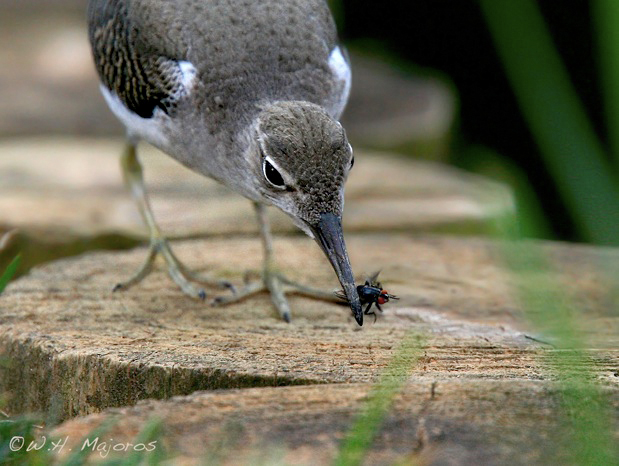
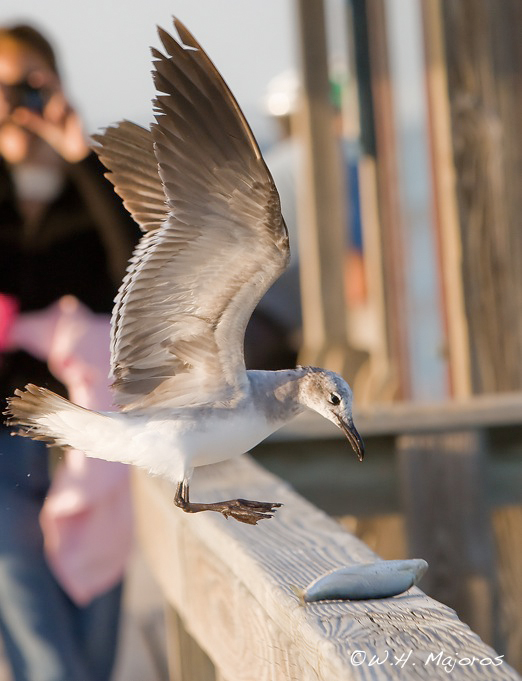
Fig. 8.4.12 :
Instead of approaching the bird, it’s sometimes better to wait for
the bird to approach you. When I saw that this sandpiper was
foraging along
a narrow strip of land bordering a pond, I positioned myself further
along the
shore and waited. Once it had approached to within shooting
distance, I
continued to wait until the bird presented a good pose. When the
bird began
stalking a fly perched on a wooden piling nearby, I knew the right
moment was near.
If you do
decide to approach the bird (rather than waiting for it to approach
you), there are several important things to keep in mind. First,
many birds are suspicious of long, gun-shaped objects, so be careful
about swinging your huge lens or tripod around when you’re within “firing distance” of the bird. Move slowly
and try to avoid
moving directly toward the subject. If the bird is looking in
your direction, then try to avoid staring at it while you approach
obliquely. If there’s a wide-boled tree between you and the bird,
it sometimes helps to first move yourself behind the tree so that the
bird can’t see you; then walk straight toward the tree (remaining out
of the bird’s view), and upon reaching the tree step out very slowly
from behind it. This sometimes allows you to approach the bird
far more rapidly than if you had to slowly walk toward it in open view,
and the savings in time may buy you a few additional shots before the
bird eventually finishes its business (whatever that happens to be) and
flies off.
In terms of actually finding birds to photograph, there
are two main strategies: the sit-and-wait
approach, and deliberate searching
(which usually means wandering around at random). Which strategy
is better depends on the circumstances. I find that actively
searching (i.e., wandering aimlessly) often works better for me, in the
types of locations where I go to do my birding. I typically only
try the sit-and-wait approach when I’m at a concentrated food source
(such as a berry bush) that I think birds are likely to visit
regularly, and even then I usually give up and revert to wandering if
they don’t show up within a certain amount of time.
Around water, searching for birds or following them
once you’ve found them can get tricky. Some people like to do
their birding in these types of environments by boat (i.e. in a canoe
or kayak), though personally I’m rather hesitant to try this, due to
the possibility of water damage to my equipment. The potential
for getting close to otherwise inaccessible birds, however, makes this
a very tempting option. Serious waterbirders have been known to
go to great lengths to camouflage their crafts, resulting in floating
photo blinds that can get their occupant within literally inches of
their quarry. The photo below (courtesy of Fred Hurteau)
illustrates just how cryptic these vessels can be made to be.
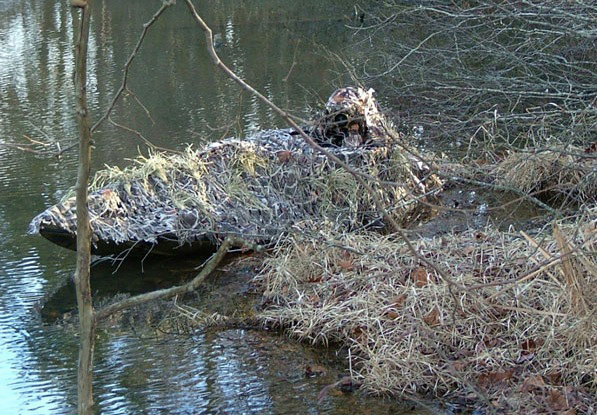
Fig. 8.4.13 :
Believe it or not, there’s a boat in this picture! The heavily
camouflaged
boat is “parked” at the edge of
a lake, and its occupant, also heavily camouflaged,
is wielding a camera with a small lens. A rig like this can
sometimes get you so
close to your quarry that you don’t need a big lens to get a
frame-filling shot.
Photo ©Fred Hurteau,
used with permission.
For shallow water (such as in a marsh, or along a
lakeshore), the use of a boat may be overkill. For these types of
environments, wading boots can be very useful when trying to find or
follow a bird. I’ve personally used thigh waders fairly
extensively while following prothonotary warblers (Protonotaria citrea) around in a
marshy area at the edge of a lake, and also for getting better angles
when shooting tame ducks at a duck pond. Though I’ve not yet
tried using chest waders, I’d imagine that they could provide even more
flexibility in environments with moderately deep water.
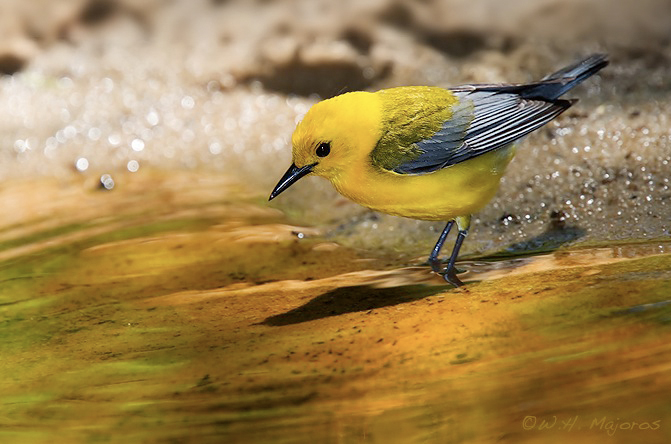
Fig. 8.4.14 :
Prothonotary warbler photographed at the edge of a shallow pool.
To get this angle I had to wade in knee-deep water; thigh waders kept
me dry. I
followed this individual bird around, off and on, for about eight
hours one day as it
foraged in a marshy area next to a lake. Without the wading
boots I would have
been much less comfortable. Note that after eight hours the
bird was still foraging,
but I had to go home because I was dead-tired from
hand-holding my huge lens
all day. It’s the only time
I’ve had my
rear-end handed to me by a three-inch bird.
It goes without
saying that the use of
higher-magnification optics effectively “gets you closer” to the bird—or rather, moderates
the necessity of getting as close (physically) as you’d otherwise need
to do. Higher magnification (i.e., focal length) can help only so
much, however, and can in some cases be a hindrance. When
shooting over a large distance at high magnification, air turbulence
and even impurities (including even swarms of insects) in the air can
noticeably degrade image quality; in this way, using higher
magnification isn’t exactly the same as being closer to the bird.
On the other hand, higher magnifications may allow you to avoid
disturbing the bird, by keeping a more respectful distance.
Keeping a 1.4× and/or 2× teleconverter in your pocket will
at least give you the option of using higher magnification when you
need it.
Keep in mind that the use of teleconverters does
come with some compromises. First, putting on and taking off the
teleconverter in the field can be very inconvenient, and increases the
chance of getting dust particles into the mirror box that can then
migrate onto the imaging sensor, resulting in visible dust spots in
images. Teleconverters decrease the aperture, and for many
camera/lens combinations this will disable autofocus capability, or
force you to perform autofocus with the center AF point only.
Attaching the teleconverter involves introducing a number of additional
glass elements into the imaging light path, which can reduce sharpness
and possibly affect image quality in other ways (such as via aberrations—see section 3.3).
Finally, by using a higher magnification you exacerbate the
effect of optical leveraging
(section 3.5), which effectively magnifies the
blurring effect of
camera shake.
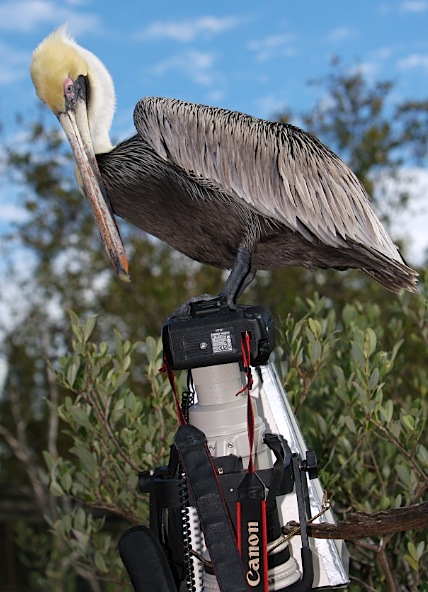
Fig.
8.4.15 :
Pelican perched on the author’s camera.
It’s amazing how
close birds will get when they’ve
been acclimated to human presence. This was obviously
one of those cases where a high-power lens was rather
less useful for magnifying the bird—though it
turned out
to be useful for supporting the bird!
|