|
4.4 Other
Accessories
A number of other accessories,
while in most cases rather mundane, are worth mentioning very briefly
at this point. These cluster roughly into two groups: those used
for powering the camera system (i.e., batteries and their associated
gadgetry), and those used for protecting equipment from damage or loss.
4.4.1
Battery Accessories
It goes without saying that spare batteries, both for the camera and
the external flash unit, are essential for any extended shoot (i.e.
one lasting more than a few hours). Fully-charged camera
batteries tend to
last longer in the field than flash batteries (if you're heavily using
the
flash), and for some camera models a battery change is only necessary
once per day. My “pro” camera's battery lasts all day
long, though I keep a spare in my accessories bag just in case I forget
to recharge the main battery overnight. For the non-pro models
that I’ve used, the spare battery has proved more essential, since
they’ve rarely lasted through an all-day shoot even if fully charged
the night before. Note that for a number of consumer-grade and
prosumer models, spare camera batteries are available from third-party
manufacturers at much lower prices than from the camera maker; though
I’ve never used one of these, there are persistent rumors that these
don’t last nearly as long in the field as the “real” versions, and that
their ability to hold a charge gradually deteriorates after some number
of months.
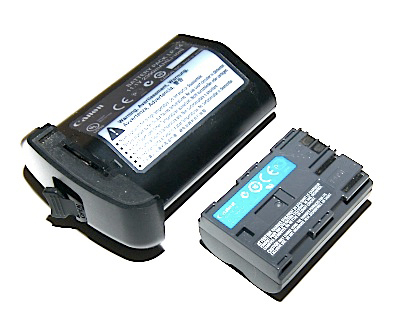
Fig. 4.4.1: Some batteries last longer than others. The battery
on
the left is from a pro camera, and typically lasts all day long, whereas
the battery on the right, from a prosumer model, typically has to be
recharged after a few hours of intense shooting in the field.
Batteries for
flash have already been discussed in
section 4.3. To that discussion we’ll
merely add here that some
third-party high-voltage battery packs are available (such as those
offered by Quantum) which can
power both the camera and an external
flash. It’s worth reiterating here that the use of these
high-voltage third-party units will typically void the warranty on your
camera and flash unit, so that if the third-party unit fries your
camera or flash unit, you may be unable to get the camera fixed for
free by the manufacturer even during the warranty period. Also,
as mentioned several times already, when working with third-party
accessories, compatibility issues can be a nightmare to resolve, since
the two companies may simply blame each other, leaving you in the
middle with
a non-working, or even damaged, camera system. This has happened
to me twice now, and is one of the main reasons that I now rarely buy
any electronic gear from a third-party manufacturer.
One external “gadget” that I do recommend for
consumer/prosumer models is the external battery grip, such as the one
shown below for the Canon 30D/40D/50D. This unit allows you to
deploy two camera batteries at once, significantly lengthening the time
before a battery change is needed in the
field. It also permits
the use of standard AA batteries to power the camera, in place of the
camera’s proprietary battery, which can be useful in
emergencies—i.e., if you forget to recharge your camera’s battery
overnight, you can simply pick up a pack of AA’s from a “Quickie Mart” on the
way to a shoot.
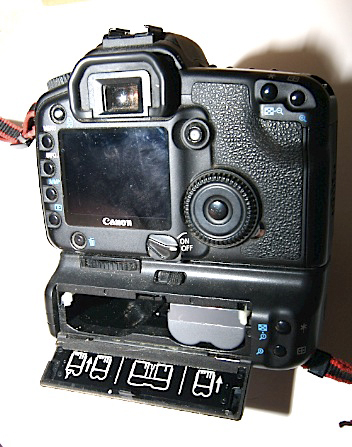
Fig. 4.4.2:
Prosumer camera with a battery grip attached
to the bottom. This grip has room for two batteries, though
only one is installed here. At the bottom right are several
buttons which make it easier to operate the camera when
shooting in portrait orientation (i.e., vertically).
The external
battery grip provides one more
significant advantage: it makes the body much easier to grasp in the
field, especially when shooting in portrait
orientation (i.e.,
turning the camera 90 degrees so that the image frame is vertical
rather than horizontal). Most battery grips provide an extra set
of controls (including an extra shutter-release button) which are
conveniently positioned for use in portrait orientation.
Photographers with small hands or who are weight-limited do sometimes
complain that the battery grip makes the camera too large and/or
heavy. Note, however, that most pro bodies come with the battery
grip integrated into the camera, so that those having issues with
camera size or weight will necessarily have to confront these problems
if and when they upgrade to a pro body.
As a final note concerning batteries, for those who
opt to use AA’s either for flash or when using an external battery grip
that supports the use of AA’s, note that there are a number of issues
regarding the quality of AA’s and their chargers that might be worth
researching before making a bulk battery purchase. Obviously,
differences in charge capacity are worth considering for the batteries
themselves. What may be less obvious is that the choice of
charger can affect the longevity of the batteries, since some chargers
are “smarter” than others. The least
intelligent of the chargers
currently available simply continue trying to recharge the battery for
as long as the battery is in the charger, so that if you don’t remove
the battery after the proper amount of time, the battery will begin to
heat up and may get damaged through overheating. Smarter chargers
will not only detect when the battery is fully charged and shut off
accordingly, but may also intelligently manage the charging schedule
(i.e., re-charging the battery more slowly) so as to avoid “memory”
build-up or overheating. The more expensive chargers also
typically monitor each of the four batteries separately, while the
cheaper
units charge all four the same, even if they currently have different
charge levels.
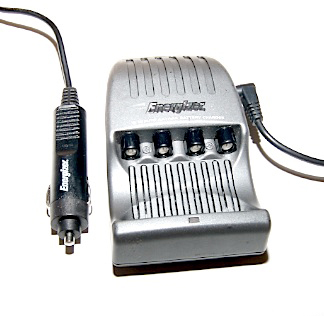
Fig. 4.4.3: A
battery charger (AA) with a cigarette-lighter
adapter. This model is made by Energizer, and can
charge four AA’s in 15 minutes. It also shuts off when
the batteries reach full charge, to avoid overheating.
The unit also plugs into standard electical outlets.
Finally, note
that AA’s with higher energy ratings
(i.e., milli-amp hours, or mAh) may actually perform worse, in terms of
the number of flashes which they can power, than lower mAh batteries,
since the higher mAh batteries may have higher internal resistance and
may convert more of their current into heat. Since new models of
batteries (and their chargers) are constantly appearing on the market,
it’s worth taking a half hour to Google some information about the most
recent models before making a purchase. At the present time, Sanyo Eneloops
seem to be very popular among flash photographers,
though I currently use Energizers
(2000mAh to 2500mAh), which I charge in
the Energizer 15-minute recharger (which can be plugged into the
cigarette lighter in your car, so you can recharge on your way to a
shoot). The rechargeable Energizers seem to be reliable, and are
sold in many big-name grocery stores.
4.4.2
Protective
Accessories
Since cameras and lenses (especially the big lenses typically used in
bird photography) tend to be extremely expensive, it’s worthwhile
looking into ways to protect your investment. As we’ve already
noted in sections 4.1 and 4.2,
a sturdy tripod and tripod head rated
for the
proper weight are essential in this regard. Here we consider a
few other accessories that can help to protect your equipment from
accidental damage (or outright loss).
For hand-held rigs, you’ll obviously want a strap
that isn’t likely to either break or to slide off your shoulder in the
field. In terms of the latter, a rubber backing can obviously
help by providing additional friction. Unfortunately, product
descriptions on web sites are rarely useful in assessing differences in
this regard, so I’ve found it necessary to order several different
models and keep the one that works best for me. In terms of a
strap’s tendency to break, an obvious red flag is the use of plastic “quick-release” clasps. These clasps allow
you to rapidly detach
one camera and attach another. Unfortunately, they also increase
the likelihood that your camera will be unintentionally detached in the
field and fall onto a hard surface (or perhaps into a river, or an
enormous canyon). Given that a quality strap can be had for
perhaps $25 or
$30 (US), it would seem more prudent to instead keep separate straps
attached to individual cameras, rather than swapping out different
cameras with one strap using quick-release clamps. Also, since
these clamps are typically made of thin plastic, there’s the
possibility of the clasp cracking slightly without your noticing it,
and then
breaking the rest of the way when you least expect it.
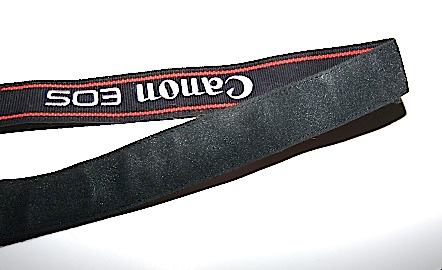
Fig. 4.4.4: A
fairly good quality camera strap. Despite not having a
rubber backing, it does tend to stay on the shoulder quite well.
This
strap cost about $24 (US) in 2008. Avoid cheap straps!
A new option in the strap
department is the so-called sling
strap. A popular brand is Black Rapid. These straps
leave the camera dangling at your hip, but allow you to very rapidly
raise the camera up to your eye for sudden shooting (see section 3.12 for an illustration). A number
of photographers have recently started to use this system even with big
500mm f/4 lenses. I
myself now use this system with my 500mm f/4 rig (with 1.4× TC attached) and find it to be
extremely efficient, permitting much greater mobility than with my
tripod-mounted 600mm rig. Unfortunately, the sling straps that
are currently available are technically not rated for the weight of a
large telephoto rig, so the hardware does wear rather quickly, and
there could be increased risks of equipment damage. (Translation: use at your own risk).
Another obvious
accessory in this category is the
bag or case in which you keep your camera and/or lens when you’re not
actively using it. Although most cameras don’t come with any type
of bag, most big birding lenses do come with a bag or even a hardshell
case. I virtually never use either of these accessories, but
others have found them useful. Backpacks designed for carrying
big lenses would seem to be especially useful when hiking to remote
locations with heavy rigs. Bags for carrying tripods are also
available. During long road trips, packing your lenses and
cameras into bags or cases is highly recommended; I don’t do so only
because I have a compact car. Their use in air travel is a more
complicated issue. For checked baggage, the use of a hardshell
case with Canon or Nikon written in large letters on the outside can of
course attract the attention of thieves; also, these large cases may
not fit in the
overhead compartment of whatever aircraft you find yourself on. A
padded bag without external markings may be better for carry-on of
large lenses, while for checked baggage it may be worthwhile to pay the
extra freight charge and use a nondescript chest padded with
clothing. A popular brand of lens bags is Lowepro.
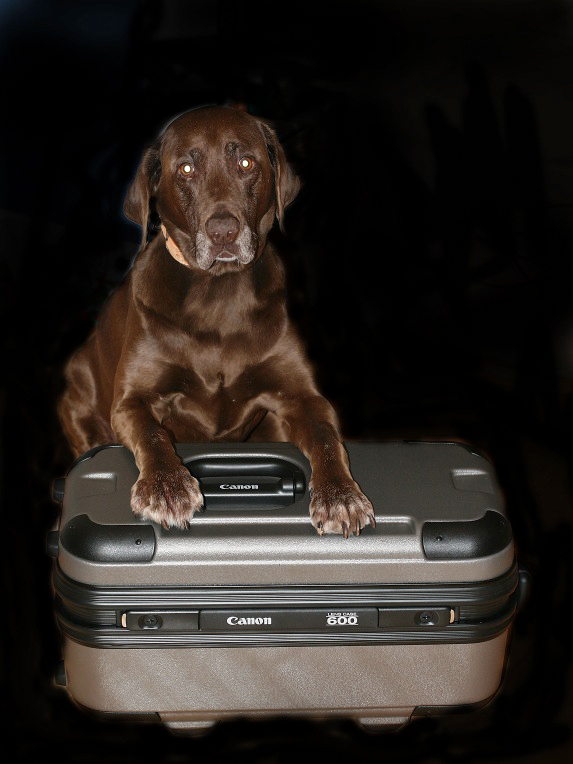
Fig. 4.4.5: A
hardshell lens case. This case is for the
Canon 600mm f/4L IS lens, which packs quite small
when the lens hood is removed. The case came free
with the lens, but sees little use. Any case that looks
like it contains expensive tech gear is likely to be stolen
if left unattended (such as at a baggage claim).
Although many
pro bodies and pro lenses are advertised as being “weatherproof”, it’s
still worthwhile to try to protect them from rain; this of course goes
doubly so for non-pro models (or pro models lacking full
weatherproofing). Weatherproofing typically just involves the use
of rubber seals around all openings in the camera or lens body, such as
around the openings for buttons and dials, or around the lens
mount. If any of
these 15-cent pieces of rubber just happened to be installed improperly
in the factory, you may end up with a ruined unit after just a few
minutes out in the rain. In the case of a simple downpour—i.e.,
not in a blowing storm with water spraying in all
directions—protecting your gear from water damage can be accomplished
with two simple accessories: an oversized umbrella, and a large,
heavy-duty garbage bag.
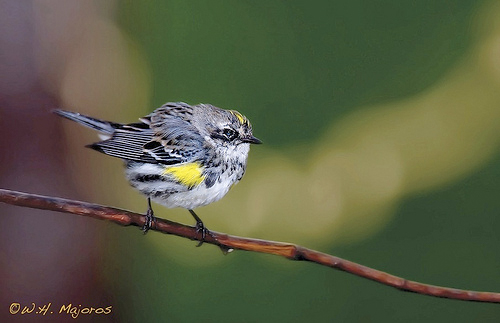
Fig. 4.4.6:
Yellow-rumped warbler (Dendroica coronata) in the rain.
Shooting in gentle rain is quite feasible with a reliable umbrella
mount.
In terms of the
umbrella, the main problem is how to
attach it to your tripod so that you still have both hands free to
operate the camera. Unfortunately, the solution to this problem
will be different for different models of tripod head. For the
extremely popular Wimberley
head, a dedicated umbrella mount can be
purchased, though they tend to be ridiculously expensive. Two
options which are far cheaper (and usable on any brand of
tripod/head/lens) are duct tape,
and plastic clamps. I’ve
successfully used duct tape to attach an umbrella in the field; the
only drawback is of course that when you remove the duct tape there
will be a sticky residue left on your gear. Plastic clamps,
together with mini-bungee cords, can work in some cases, and are
available very cheaply at stores such as WalMart and KMart.
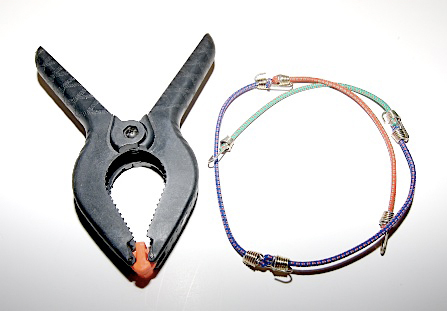
Fig. 4.4.7:
Cheap implements for mounting an umbrella on a tripod.
Both were found in the automotive section of WalMart. The mini-
bungee cords are also useful for stabilizing custom flash extenders.
In terms of trash bags, these are
simply a highly portable and
effective means of protecting your gear when you’re far from your car
(and umbrella), or when the wind starts to blow rain up under your
umbrella. Keep in mind that any gear that you keep in the pockets
of your photo vest (e.g., teleconverters, wide-angle lenses, even cell
phones) can become damaged if you happen to get caught in a fierce
storm far from shelter and end up getting soaked. For this
reason, I always keep at least
two or three large trash bags folded up in my vest pocket, as well as
some ziploc sandwich bags for smaller items.
No matter how hard you work to keep your gear safe,
there’s always a chance that something unexpected will happen,
resulting in damage or even total loss of expensive gear. For
this
reason, I highly recommend insuring at least the most expensive of your
lenses and/or cameras. Many homeowners’ insurance policies have
provisions for personal possessions damaged or lost while in the home,
due to fire or theft, and in many cases a rider can be purchased which
covers specific items from theft when used away from
home. Geico, for
example, offers a very affordable “no-fault”
rider that will cover items against even accidental damage (e.g., due
to your dropping it from a tall building or into an alligator-infested
lake).
Even if your equipment is insured, it’s always best
not to tempt thieves by leaving your expensive equipment out where they
can see it, such as in the front seat of your car while you’re taking a
restroom or lunch break. Keep in mind also that if you’re
constantly seen going in and out of your home with expensive equipment,
unfriendly eyes may eventually take notice and target your residence
for burglary. Though in nice neighborhoods you’ll likely have
nothing to fear from your neighbors, other passers-by (i.e., strangers)
are another matter. Whenever I’m not shooting birds, all of my
camera gear stays locked up in a large gun safe, which I purchased new
for a little over $1000 US (plus a few hundred for delivery and
installation). A typical 40-gun safe will provide more than
enough room for not only your cameras but also your binoculars, laptop
computers, and most important personal documents. Many safes also
provide protection against house fires, and may also allow you to
negotiate a lower rate when insuring your gear.
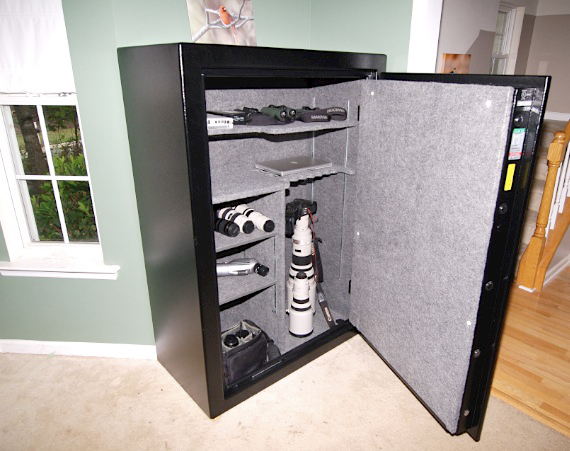
Fig. 4.4.8: My personal Fort Knox. This safe was relatively
inexpensive, and
affords me peace-of-mind when I have to leave my camera gear at
home. A
camera safe is also useful for protecting other valuable items, such as
binoculars,
spotting scopes, backup hard drives, wills, deeds, birth certificates,
and passports.
This unit also provides protection in the case of a house fire.
It's drill-proof and
virtually impregnable to all forms of attack except for some of the
larger nuclear
missiles (primarily those with multiple warheads).
4.4.3
Miscellaneous
Accessories
A few final accessories bear mentioning. The use of a
many-pocketed photo vest
has already been alluded to; these of course make it easier to carry
large numbers of extra gadgets and other accessories while in the
field—i.e., cleaning fluids and cloths, teleconverters, extension
tubes, trash bags, memory cards, lens caps, spare batteries, and even
business cards.
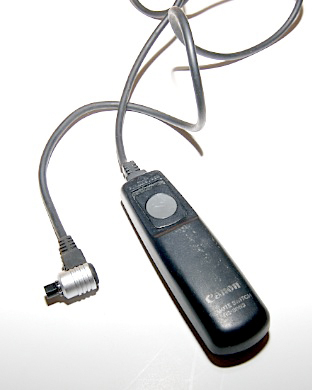
Fig. 4.4.10: A
remote shutter release. The button
works just like the shutter-release button on your
camera. Using a remote button can reduce camera
shake and improve sharpness. Nikon’s remote
is wireless, while Canon’s is rather more primitive.
One final
accessory that I keep in my vest but
almost never use is the remote
shutter release. This device
attaches to your camera at one end, while at the other end is a
shutter-release button; this allows you to snap a photo without
actually
touching the camera, and has traditionally been used to reduce
blurriness due to camera shake. In most cases, these gadgets are
simply not useful when photographing birds. Since most birds are
constantly moving, there’s little time to point the camera and wait for
its vibrations to settle. Instead, the use of image stabilization
(IS), or at the very least a firm grip on the camera and lens, is
preferable when tracking subjects that are either in motion or likely
to move at any time. One exception is when using extreme focal
lengths to photograph highly stationary birds in little or no wind,
such as at a nest
site. For the shot of the eagle nest shown below, I was shooting
at 1200mm, with IS turned on and with the shutter triggered via a
remote release cable. When the wind later picked up, however, I
had to abandon the remote and use my hands to stabilize the lens.
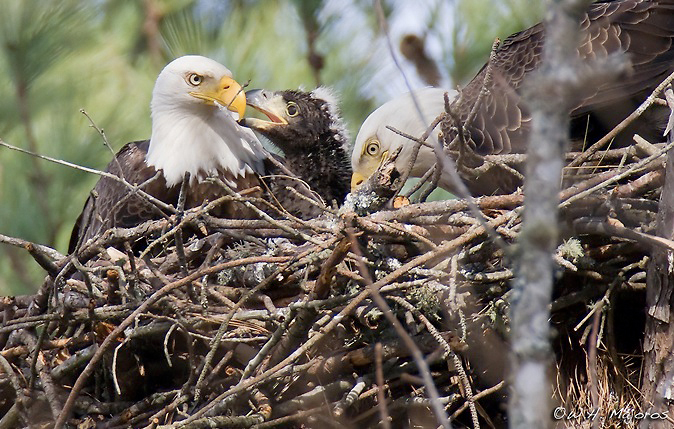
Fig. 4.4.11: Bald eagle family in North Carolina. This photo was
taken at a whopping 1200mm
focal length, requiring the greatest care to avoid camera shake.
A remote shutter release was used,
in conjunction with image stabilization. Focus and exposure were
set manually.
|
|
|